As a dressmaker there are three words you should never say to me, and they are ‘there’s no rush’, closely followed by the phrase ‘when you have time’. I’m pleased to say that I have never missed a firm deadline for a project, but three years ago a lovely lady told me ‘there’s no rush’ when I asked her when she needed this dress…. and here we are, finally it is finished. But its been so long I’ve lost her phone number. So she may never know that I did eventually ‘get around to it’.
For three years Manny (my male dress-form) has been padded out as a lady and modelling the first mock up of an 1860s dress bodice intended to be worn at Howick Historical Village Live Days. I had taken on this project while unemployed, but a week later landed the job I am still in, suddenly I didn’t have so much free time as I expected. Added to that the mock up was not particularly successful, so I quickly lost motivation for this volunteer work (it was an unpaid commission) and over three years had not regained any enthusiasm for it.

However two things were about to change that.
Firstly, I am part of a group called the Historical Sew Monthly which each month sets a theme and everyone participates by researching and sewing a garment to fit the theme. It has become a rather lovely community – and while I have participated in very few challenges due to time constraints, one earlier this year caught my eye… The challenge was PROCRASTINATION, of which I am a master.
Secondly, I had a paying commission to make a rather exciting jacket (hopefully I will be allowed to post about that shortly – but for now its a secret) and for the first time in three years I really needed Manny to be a man. And I did NOT want to unpad the mannequin because I was sure I would then NEVER complete the dress.
This meant that suddenly I had not one, but two reasons for completing the dress!
I was happy with the fit of the mock up from 2013, just not the styling, so I removed the draped piece from the neckline and spent some time staring at the mock up trying to figure out what was wrong with it…

The darts didn’t seem to be in quite the right place and were going too far up the torso, the armholes were a funny shape and the shoulder seams were sitting too far forward.
To help identify how to make the dress more accurate I flicked through some fashion history books and images from Howick Village. The goal here was not to create some fancy frippery, but something a hard working colonial woman would have comfortably worn on a day to day basis, it would be worn by a ‘Historical Interpreter’ who would need to be able to demonstrate historical activities, maybe bake bread, churn butter, fetch water from the well, climb steep staircases, tend an open fire etc. It was also requested that it open at the back with a zip (hidden by a large placket). Emphasis here was on an appropriate look for the period – but not necessarily accurate construction etc.
Carl Kohlers book A History of Costume is one of my favourites for detailing garments pre 1865, many of the photos of original garments are accompanied by patterns which are easy to scale up, I’ve used some of the men’s ones successfully before. Below was a dress which caught my eye and included a pattern – however I decided it was a little too tailored and stylish for what I needed.

The book which I ended up using a pattern from was of course Janet Arnold’s Patterns of Fashion 2, page 24 and 25:

So I drew out the accompanying pattern and discovered it was incredibly tiny! It looked like a child’s bodice! I laid the tiny pattern on top of the pattern used for the mock up and the size difference was massive (see photo below). I drew out a hybrid of the two – using the proportions and panel style from Janet Arnold’s pattern, but the sizing of my mock up.

The result of these pattern alterations was actually rather good! Despite the mannequin being unchanged in terms of shape, the panel seaming on the second mock up was much more flattering and did create a more era appropriate silhouette.
I played around with fringing as per the dress in Patterns for Fashion 2 – but it didn’t look good. Whether it was the larger dress size or simply the proportions of the lady I was making this for, it was not a flattering line to emphasise.

Next I made the sleeve pattern.
I drafted Janet Arnold’s and then slashed and spread the patterns to size them up enormously. See below the process and result (image on the right shows Janet’s sleeve versus the size I scaled it up to).


I had so much fabric that I didn’t bother mocking up the sleeves. I was happy with the bodice fit and style so I cut it out of the real fabric for use as lining. The sleeves set into the armhole nicely and hang angled forward correctly. This was something of a relief as they are cut very differently to modern sleeves and featured some unusual details. The first thing I noticed was the pleat on the under sleeve in the armpit; there is no ease in the sleeve head – just this pleat in the underarm. The sleeve head itself is very shallow – I imagine this is due to the dropped shoulder position which it connects to – but it also probably allows extra arm movement (I can’t be sure of that as no one has yet worn this dress).

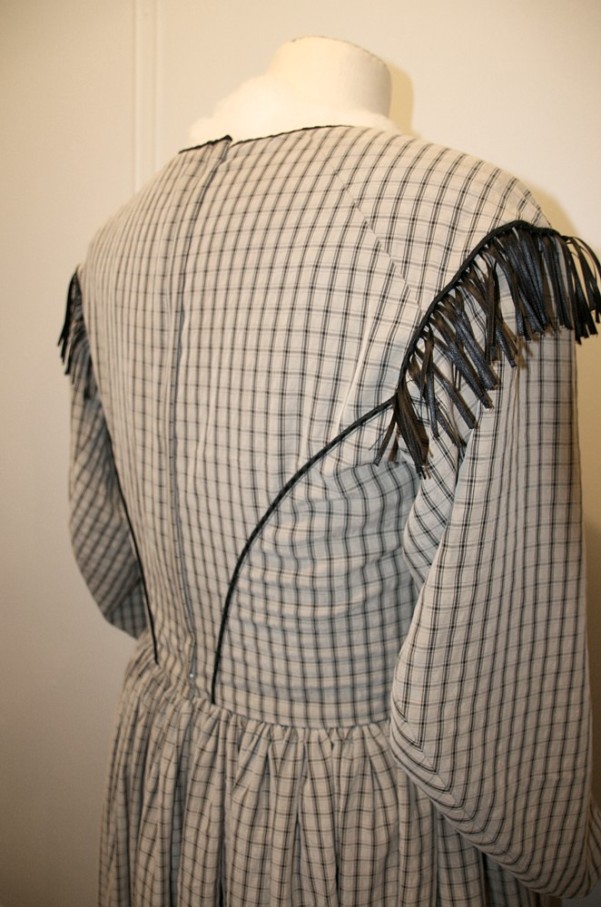
I redesigned the bodice for the outer layer, wanting to emphasise a more flattering shape I went for a large V style line emphasised with piping and cut the plaid on the cross so that the lines followed the seaming.

Although bulky, the dress was not hard to sew and went together pretty quickly. The neck, cuffs and back seams were piped, 4 widths of fabric were stitched together for the skirt, pockets hidden in the side seams and voila!

I am very pleased to have this dress finally complete and no longer looking at me accusingly every time I enter the sewing room, but I’m still a little embarrassed to contact the Village and admit I took this long! I don’t know if the lady it is for still volunteers at the village or if she is still the same dress size, but on the chance that she does and she is, this dress will be dropped at the Village and hopefully will one day be worn by the intended recipient.
Maybe soon I will be able to share images of this dress being worn at the Village – but don’t hold your breath!
